


Halloween is upon us and aside from devouring bags of fun-sized candy or relentlessly decorating our living rooms, we often forget that there are other ways we can make the season more spooky. Everyone loves food, and whether you cook, bake or solely rely on microwave meals, there are some recipes anyone can make that are suitable for the holiday. Here is a list of four recipes to get you feeling extra festive and ready for Halloween!
Peanut butter spider cookies
Ingredients:
- ¾ cup all-purpose flour
- ¼ teaspoon baking soda
- Pinch of salt
- ½ cup granulated sugar
- 4 tablespoons unsalted butter
- ½ teaspoon vanilla extract
- 1 egg
- ½ cup smooth peanut butter
- 2 ounces semisweet chocolate chips
- 1 tube of white cake decorating gel
- Malted milk balls with chocolate coating (i.e. Whoppers or Maltesers candy)
Instructions:
- Preheat the oven to 375 degrees F and line the baking sheet with parchment paper.
- Mix together the flour, baking soda, and salt into a bowl.
- Cream together the sugar and butter into another bowl for 3 to 4 minutes, ensuring the mixture is light and fluffy. Add the vanilla extract and the egg, mixing until combined. Add the peanut butter and mix until creamy. Add half of the flour mixture and beat slowly before adding the rest of the flour, mixing until all the ingredients are combined.
- Roll the dough into 1-inch balls and place about 1 inch apart on a baking sheet then bake for about 16 minutes or until the cookies are a light golden brown.
- While the cookies are baking, melt the chocolate chips over medium heat in a pot. Remove from heat and let the chocolate cool until slightly thickened.
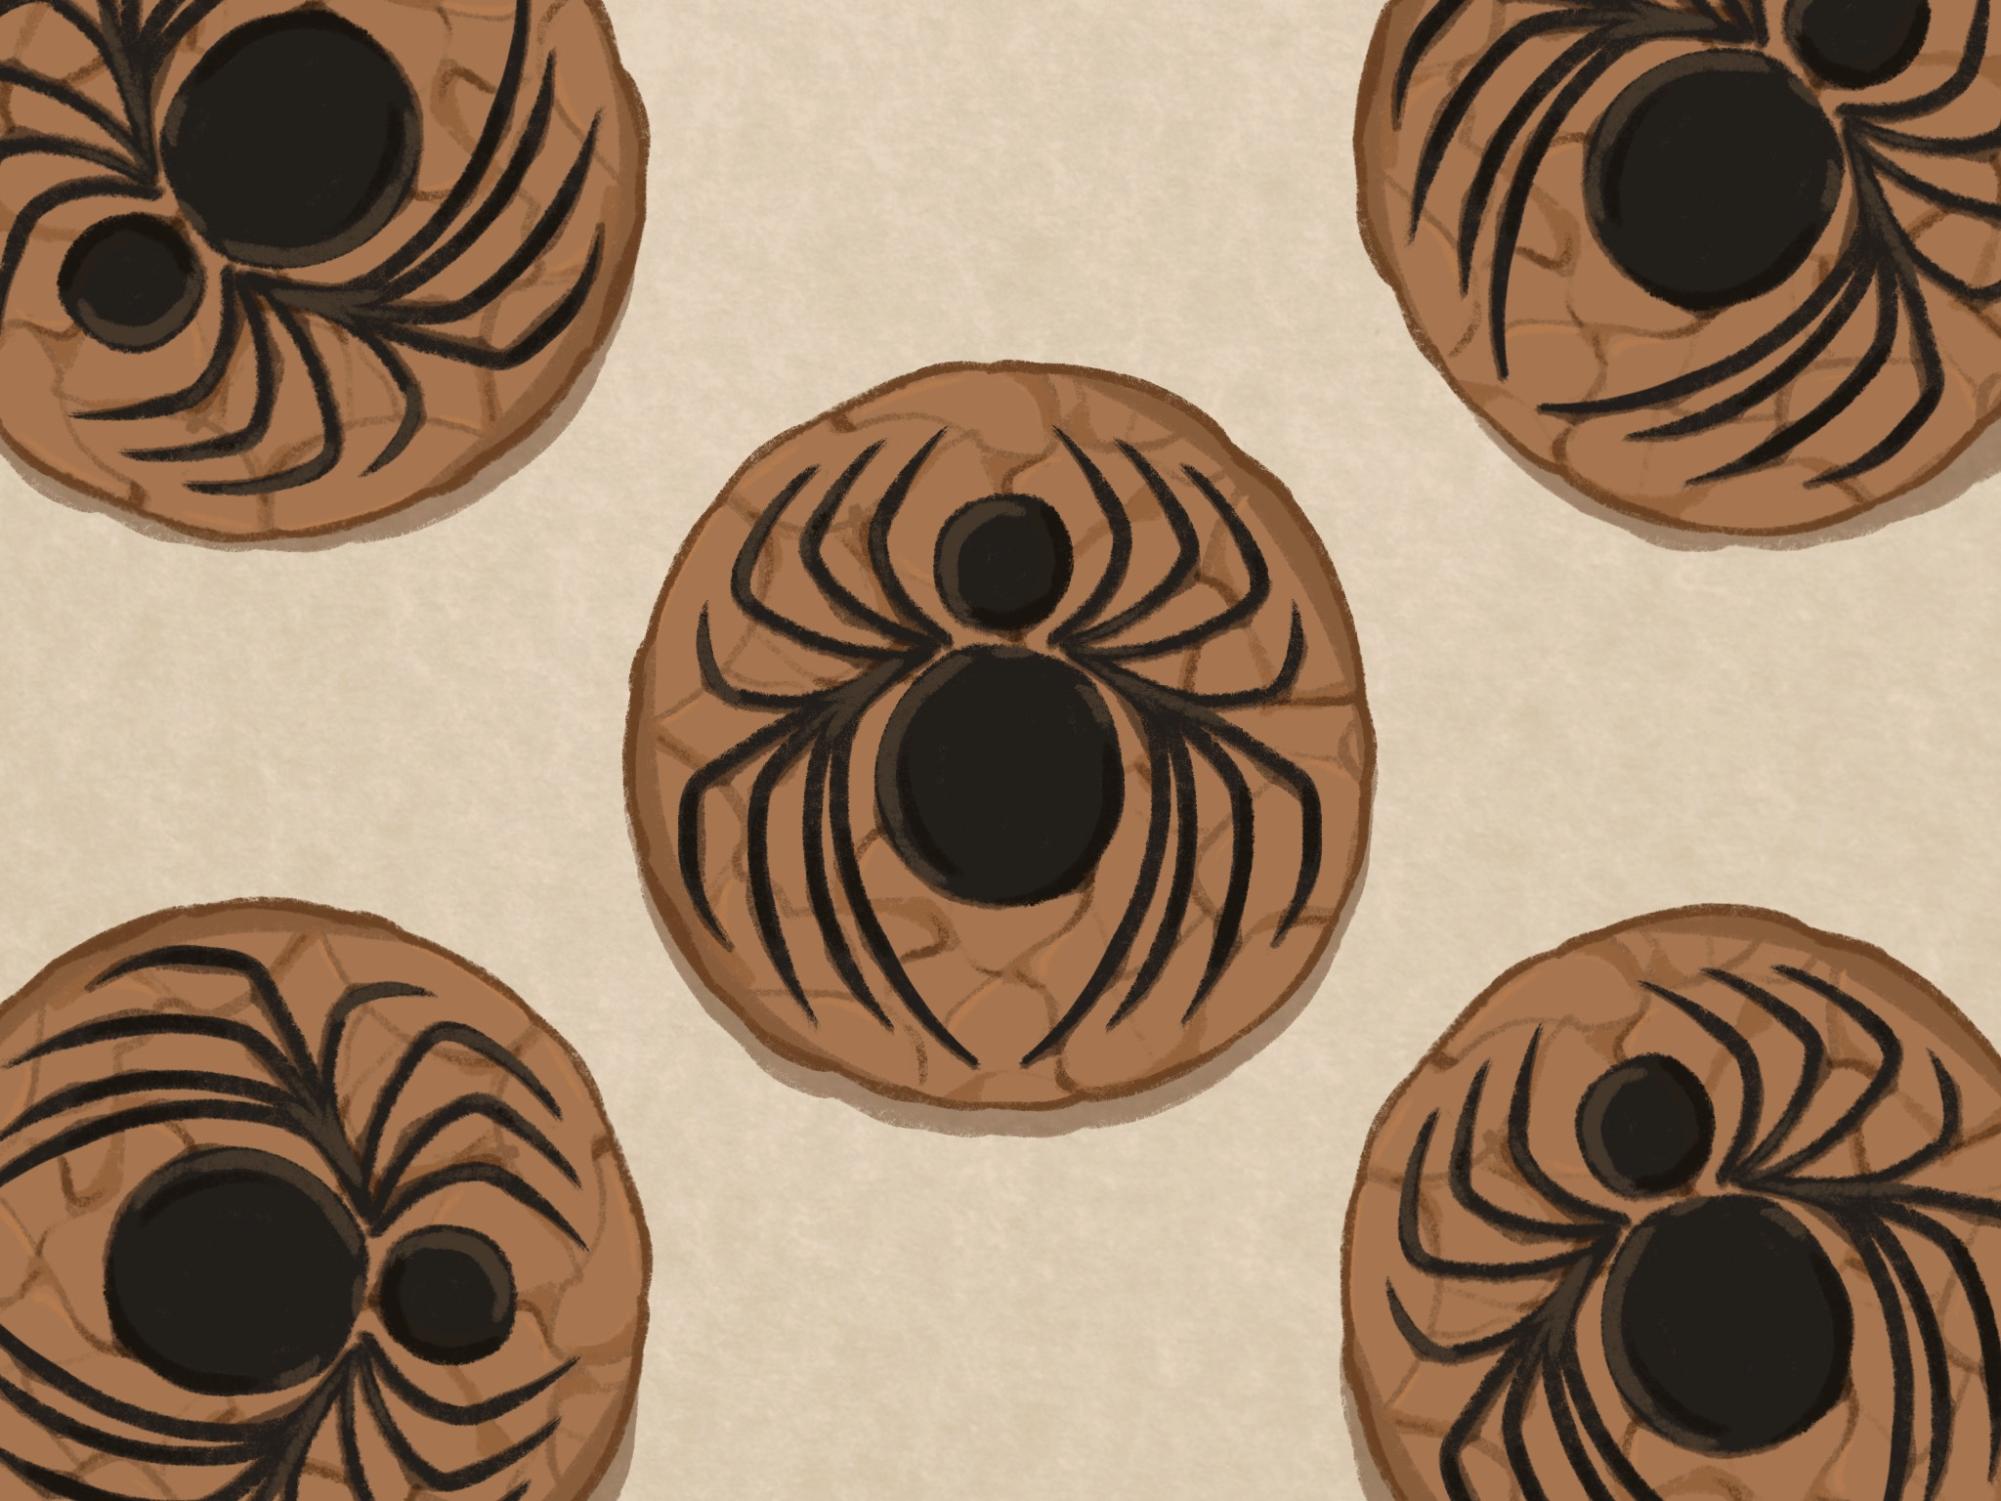
- Once the cookies are done, remove them from the oven and let them cool. Then place 2 chocolate malted milk ball candies onto the top of each one of the cookies, where the one chocolate ball is on the edge of the cookie and the second chocolate ball is directly behind it in the center.
- When the melted chocolate has thickened, pour it into a plastic bag and cut a small hole in one of the corners to create a piping bag. Pipe 8 lines of chocolate (spider legs) onto each one of the cookies, starting at the point where the two chocolate candies meet. Pipe the front of the 4 legs so they curve upwards towards the head, with the other 4 legs curving backward from the body.
- To make the eyes, pipe two small circles of white cake decorating gel on each of the spider heads. Pipe a small dot with the rest of the melted chocolate in the center to make the pupils of the eye.
While this is a recipe for creamy peanut butter cookies, you can also modify the recipe for any type of cookies you might be craving. Chocolate chip cookies? Sugar cookies? Yes to both. If you live in a residence hall, you can make a chocolate spider on top of any store-bought dessert. You can also test your art skills and attempt to draw a jack-o’-lantern or Jack Skellington’s face on the surface of some cookies if you are a little afraid of eating the spiders.
Webbed rice crispy treats
Ingredients
- Two 12-ounce bags of marshmallows
- 6 tablespoons unsalted butter
- Green food coloring
- Purple food coloring
- 9 cups rice crispy cereal
- ½ cup semisweet chocolate chips
Instructions:
- Line a 9 by 13-inch baking dish with foil and spray with cooking spray.
- Remove half of the marshmallows from one bag and set them aside in a bowl.
- Divide the remaining 1 and ½ bags of marshmallows evenly between 2 separate microwave-safe bowls. Divide the butter evenly between the 2 bowls as well.
- To begin melting the marshmallows, microwave 1 bowl for about 45 seconds. Stir the contents and microwave again for about 30 seconds, or until completely melted.
- Add a few drops of green food coloring into the mixture and stir. Add 4 ½ cups of the rice crispy cereal into the bowl and stir well so the cereal is completely covered.
- Repeat the melting process with the second bowl of marshmallows and butter. Add in a few drops of the purple food coloring and mix in the remaining 4 ½ cups of rice crispy cereal.
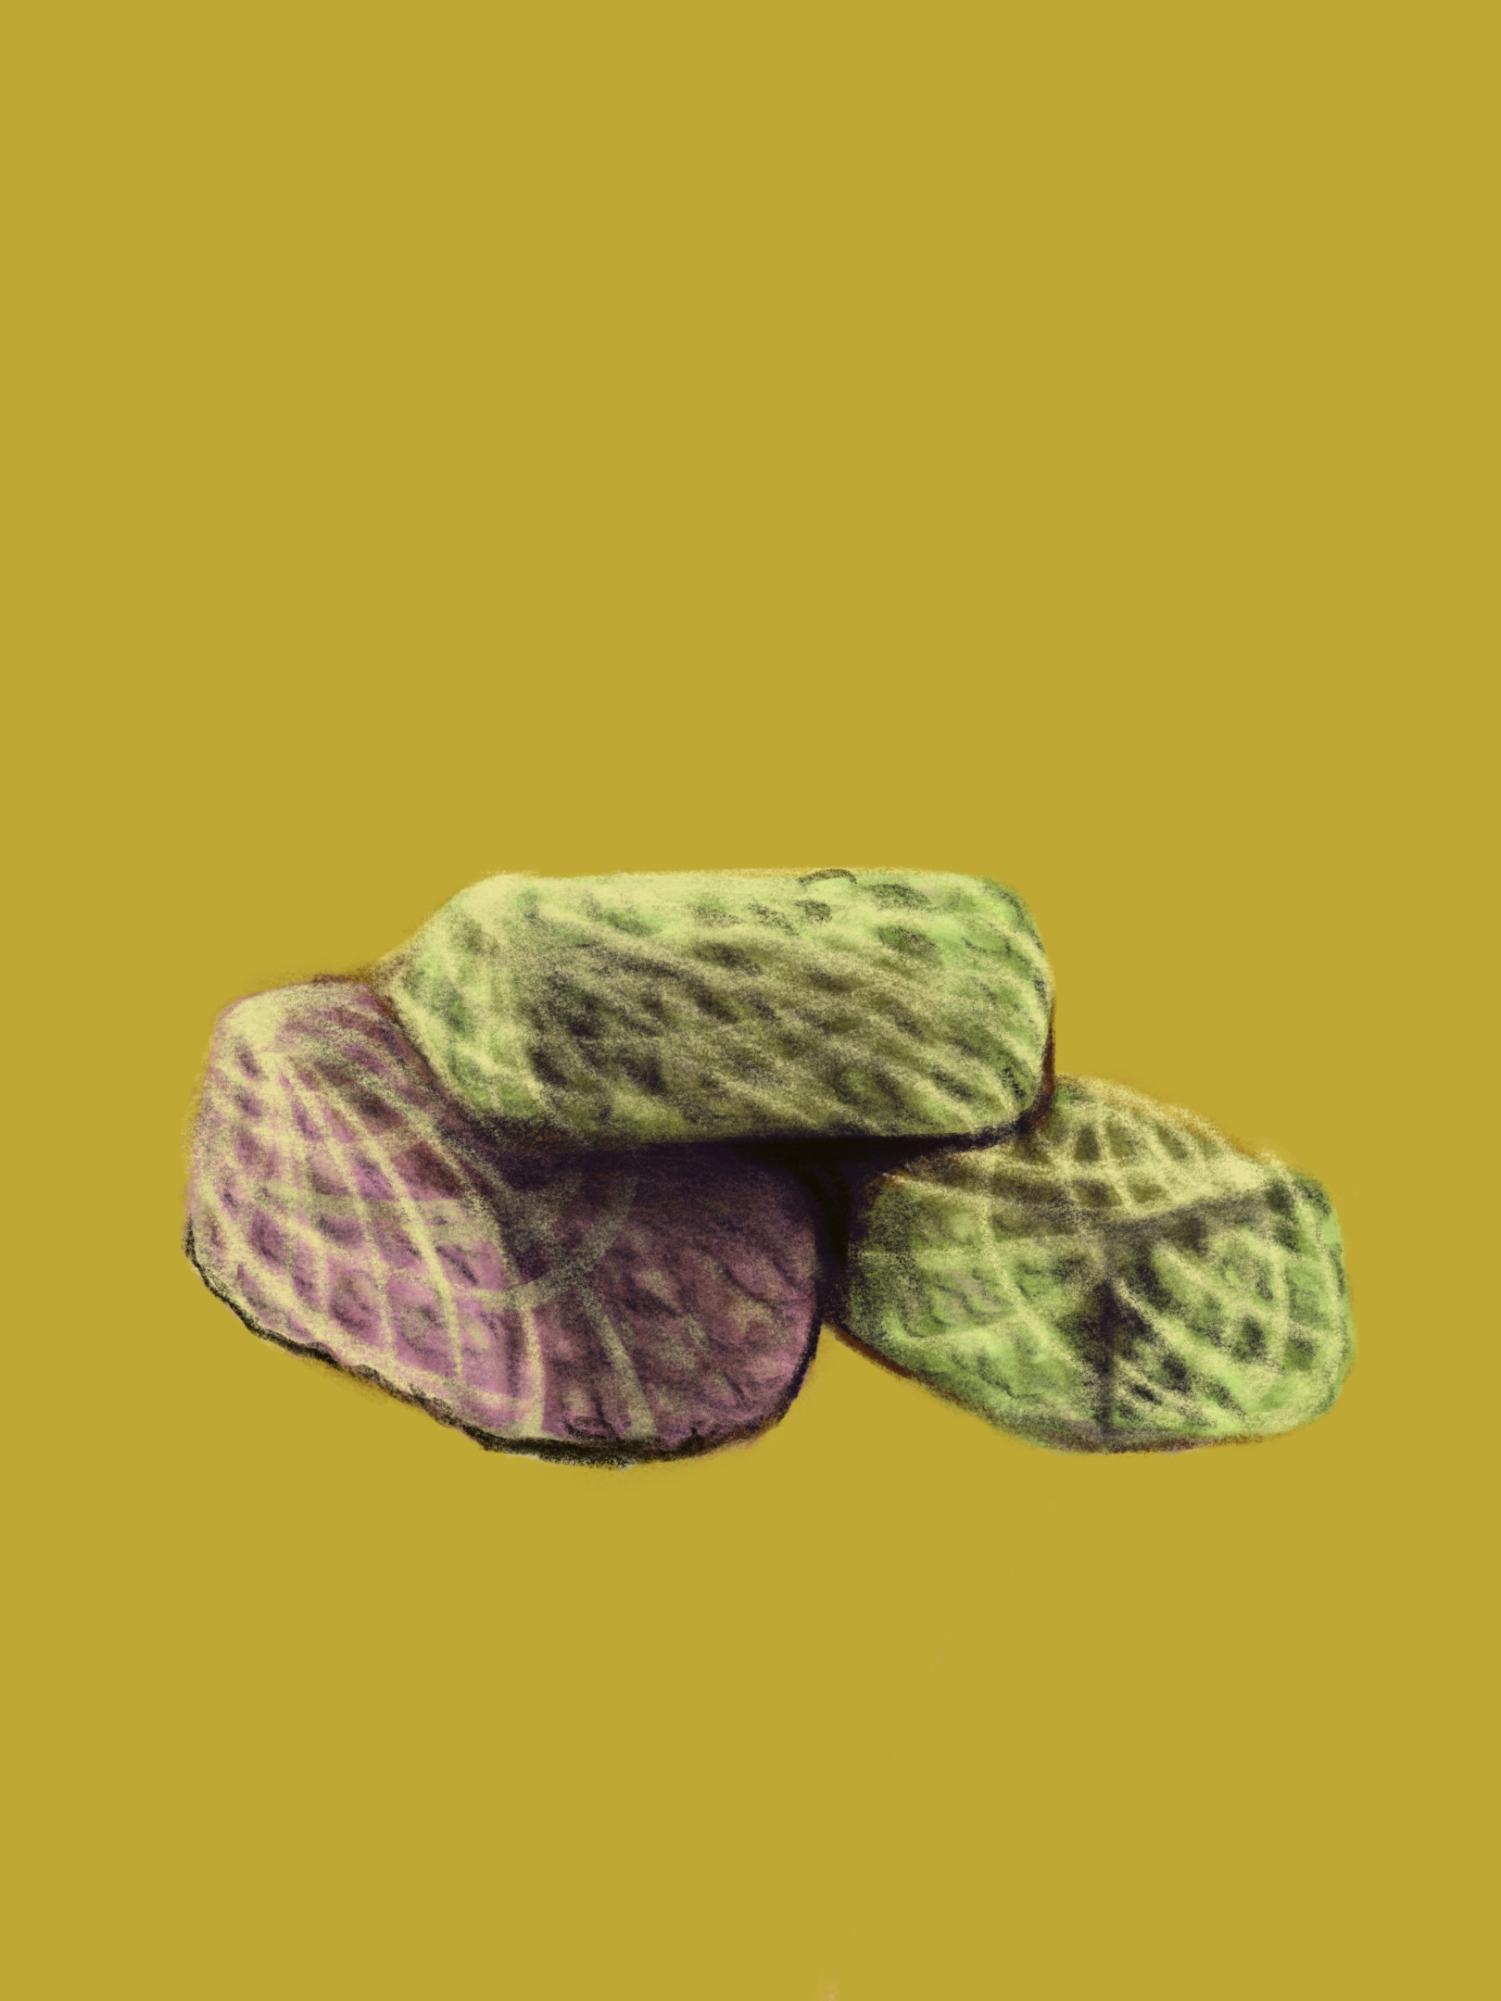
- Grease your hands with cooking spray or use disposable gloves to take a handful of the rice crispy mixture of each color. Place handfuls of both colored mixtures into the baking dish and distribute the green and purple mixtures as desired into several layers.
- Once the entire mixture is used, press it into the pan to even it out. Let it cool to room temperature.
- After cooling, cut the whole treat into 9 squares. Separate each of the treats on the foil so there is some space between each one.
- Put the remaining half bag of marshmallows into a microwave-safe bowl for about 45 seconds. Stir the contents and then microwave again until completely melted for about 30 more seconds. Ensure the mixture is smooth and set aside for a few minutes to cool.
- Wearing disposable gloves, dip your hands into the marshmallow mixture and rub in between until long sticky strings form when pulling your hands apart. Pull apart the strings and drape them across the treats. Scoop up more of the marshmallow mixture as needed. Pull the strings in different directions to achieve a web-like pattern.
If you want to have more than just eerie webbed rice crispy treats, feel free to melt some chocolate chips and put the melted content into a small plastic bag, cutting one of the corners to serve as a piping bag. Then pipe small spiders or any fun Halloween icons like a bat or a witch’s hat onto each treat. The possibilities are endless and besides getting a delicious treat, you can have fun making the entire recipe.
Poison apple cider

Ingredients:
- 4 slices of peeled ginger
- 6 cups apple cider
- Zest of 1 orange
- Zest of 1 lemon
- 1 to 2 cinnamon sticks
- 3 whole cloves
- 1 red apple (for garnish)
- Gummy worms (for garnish)
- One 25-ounce bottle of sparkling cranberry-apple juice
Instructions:
- Smash the peeled ginger slices with the flat side of a chef’s knife and transfer them into a medium-sized saucepan.
- Add the apple cider, orange zest, lemon zest, cinnamon sticks and cloves into the saucepan. Bring to a simmer over medium heat.
- Let the liquid simmer for about 10 minutes and then strain into a pitcher. Let the liquid cool at room temperature before refrigerating until chilled.
- Slice the apple into about 8 wedges and make holes with a chopstick or skewer. Insert a gummy worm into each one of the wedges.
- Add the cranberry-apple juice to the apple cider mixture and serve over ice.
- Garnish each of the rims of the cups with the apple wedges.
Don’t worry — you won’t actually get poisoned like Snow White if you drink this apple cider. A balance of sweet and savory with a gummy worm-infested apple wedge and bubbling apple cider. This drink is safe for consumption!
Berry Eyeball Punch
Ingredients:
- 3 cups blackberries
- One 20-ounce can of lychee and ¾ cup syrup from the can
- ¼ cup fresh lemon juice
- 2 cups sweetened acai juice
- 1 cup blueberry juice
- Small container of blueberries
- 3 cups lemon-lime soda
Instructions:
- Puree the blackberries, lychee syrup and lemon juice in a blender. Then, strain the juice into a pitcher.
- Add the acai and blueberry juices into the pitcher and refrigerate until chilled.
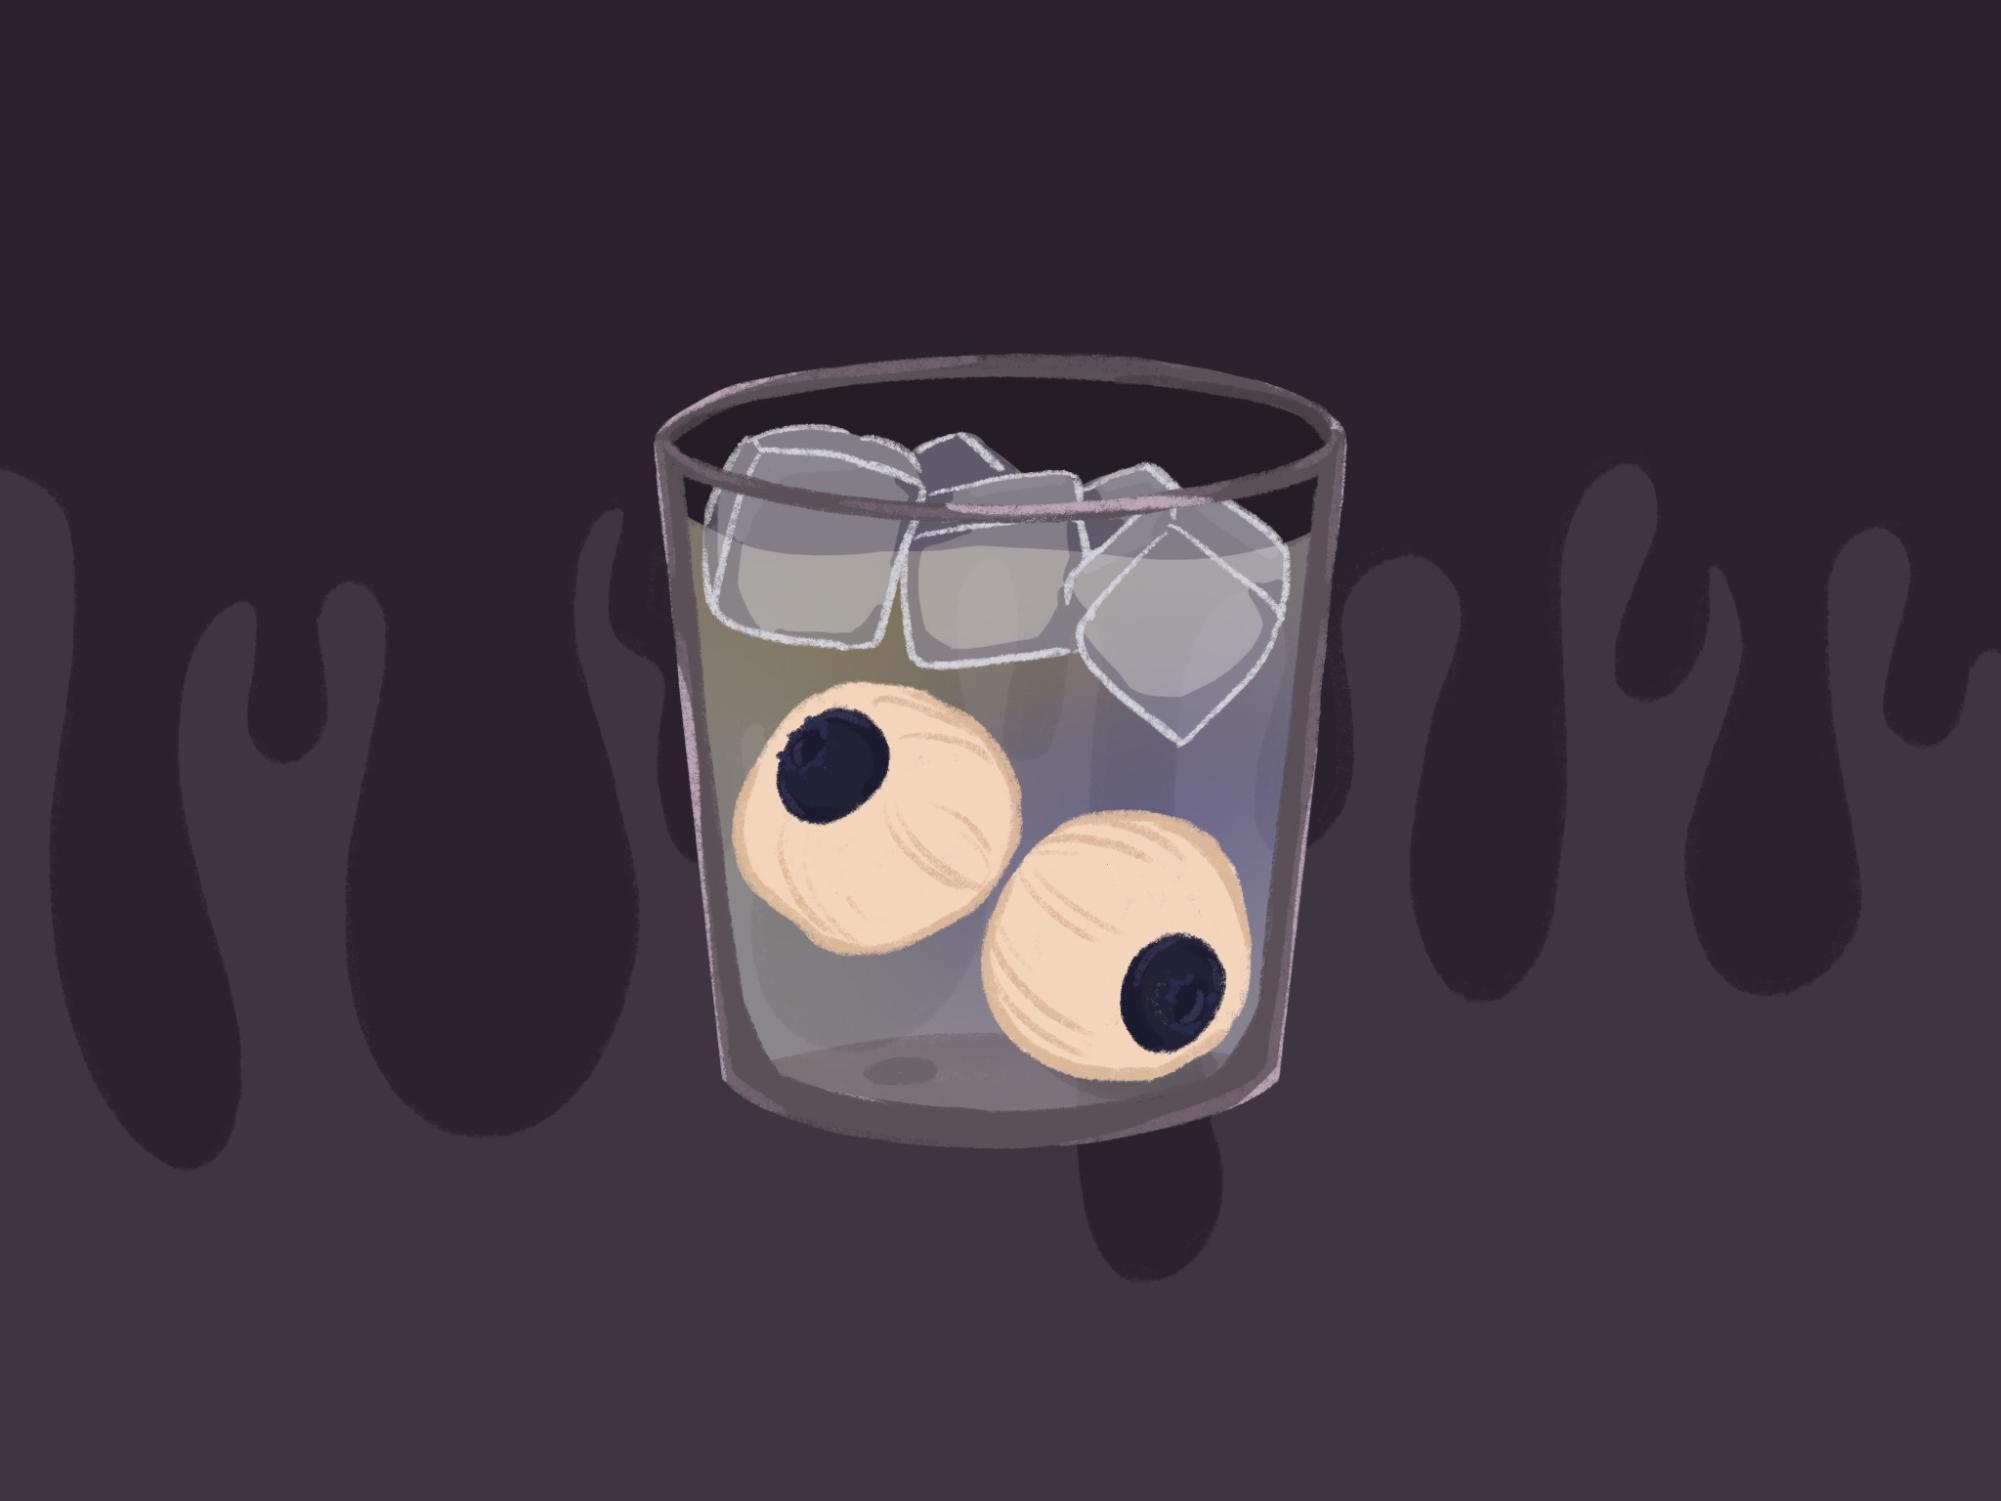
- To make the eyeballs, push a blueberry into the cavity of each lychee from the can.
- Keep the punch in the pitcher and add the stuffed lychees into the punch.
- Gently stir in the lemon-lime soda and serve over ice.
I’m personally a big fan of fruit, especially any kind of berries, and this punch is perfect for all the berry lovers out there. The taste is refreshing, and without an overload of sweetness or a completely tart taste. Perhaps a big bowl of dark red juice and floating blueberry lychee eyeballs floating around might be suspicious to general audiences. Still, at least you know the truth — nothing is petrifying about this punch.
Contact Sar Perez at [email protected].