


From the person in a trench coat pursuing the dark academia aesthetic to the person who dresses exclusively in pastels, scarves are a beloved and essential accessory to level up an outfit. Especially as NYU students, we are no strangers to freezing from windchill during our walk to class, our dorms and dining halls. Scarves are a necessary tool to prevent both hypothermia and a bland outfit.
Changing how you tie your scarf can instantly change the vibe of an outfit. If you never learned how to tie a scarf, or are looking to add some variety to your fashion, consider using one of these styles the next time you decide to throw one on.
Front tie
Simple yet put-together, the front tie is perfect on your way out the door.
- Hang your scarf around your neck and adjust so that the two ends are of similar length.
- Tie the two ends together.
- Adjust as needed; tighten or loosen the knot to your preference.
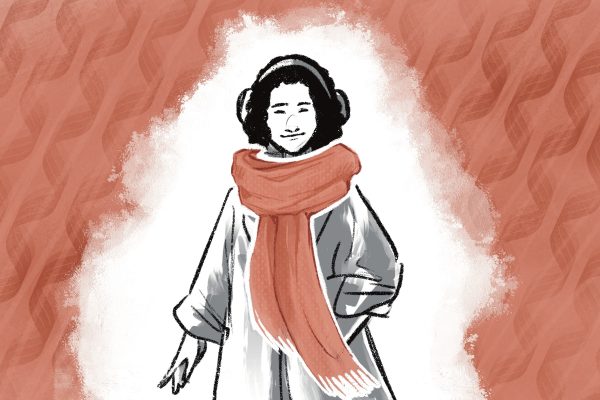
Basic loop
A more advanced variation of the front tie is the basic loop – a classic.
- Holding the ends of your scarf in each hand, fold the scarf in half and bring the ends together.
- Hold the ends in one hand, and the loop in the other.
- Drape the folded scarf around your neck.
- Pull the ends through the loop.
- Tighten as needed, adjusting the loop and shifting the ends of the scarf so they lay vertically along the height of your body.
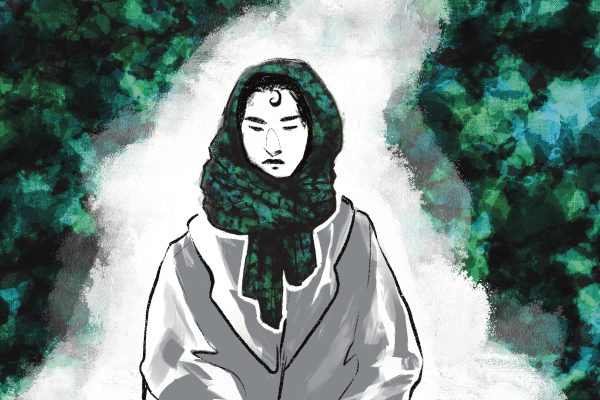
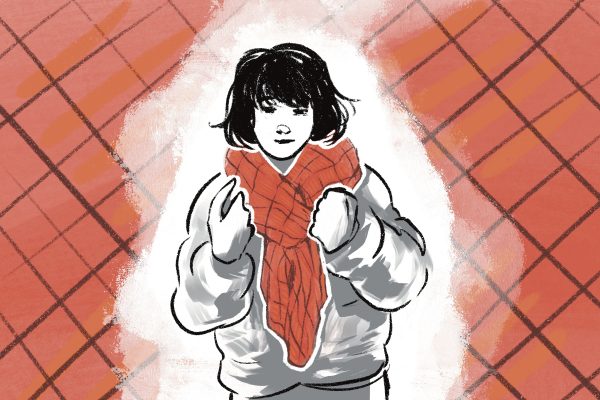
Balaclava style
Tying a scarf balaclava-style has made waves on social media, and is perfect for keeping your neck, face and ears protected from icy winds.
- Drape the scarf backward around your neck so that the ends are touching your back.
- Cross the ends and bring them to the front of your body.
- Gently tuck each end of the scarf through the loop around your neck.
- Take the loop around your neck and carefully pull it over your head, making sure that your neck is still covered.
- Adjust the tightness of the hood and neck portion until comfortable.
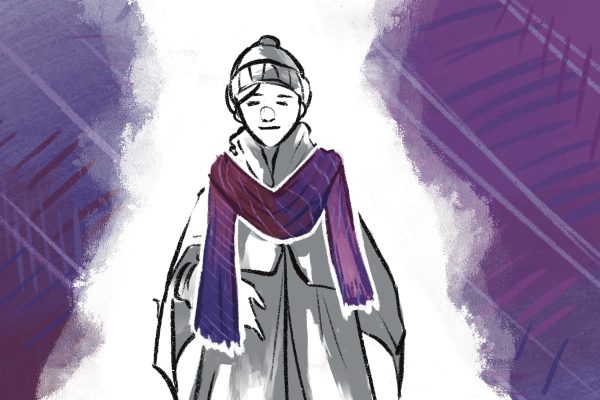
Hidden knot
Tie your scarf as a hidden knot to achieve a clean and polished look.
- Drape your scarf backward around your neck, making sure the ends of the scarf are on your back. The ends should not be visible from the front.
- Take both of the ends, cross them and bring them over your shoulders to the front.
- Now at the front of your body, tie the ends of the scarf together to make a knot.
- Tuck the knot under the loop created in Step 1. Adjust as needed.

Infinity loop
If you’re sick of the ends of your scarf flying everywhere, this faux-infinity scarf trick is just for you. Use a longer scarf, which will make it easier to tie the scarf together.
- Take your scarf and fold it in half so that both of the ends are on one side.
- Tie the two ends together with one knot. You should end up with one big loop.
- Put your head through the loop with the knotted ends visible and in the front.
- Take the excess hanging on the front of your body and twist it to create a figure eight.
- Put the loop you just made over your head. The knots should now be on the back of your neck and unnoticeable from the front.
- If you feel the knotted part is visible, feel free to tuck it into the excess fabric.
Contact Joanne Lee at [email protected].